S’more Brownie Bars

If you ask any Harchut sister what one of their favorite vacation spots is, we will always answer…CAMPLAND. Campland on the Bay is the perfect combination of actual camping and glamping. You stay in a trailer (or tent), have a fire pit, decorate with beer can lights, and cook good ole camping food, BUT, you also have hot showers and very clean restrooms! And there may be a cantina that serves delicious drinks right there on the campground but thats besides the point.

ANYWAY, every night we love sitting around the camp fire chatting, drinking, and making s’mores! Unfortunately, it’s been pretty chilly here in SoCal (70° is cold OK), so we brought the s’mores inside and boy oh boy they didn’t disappoint.
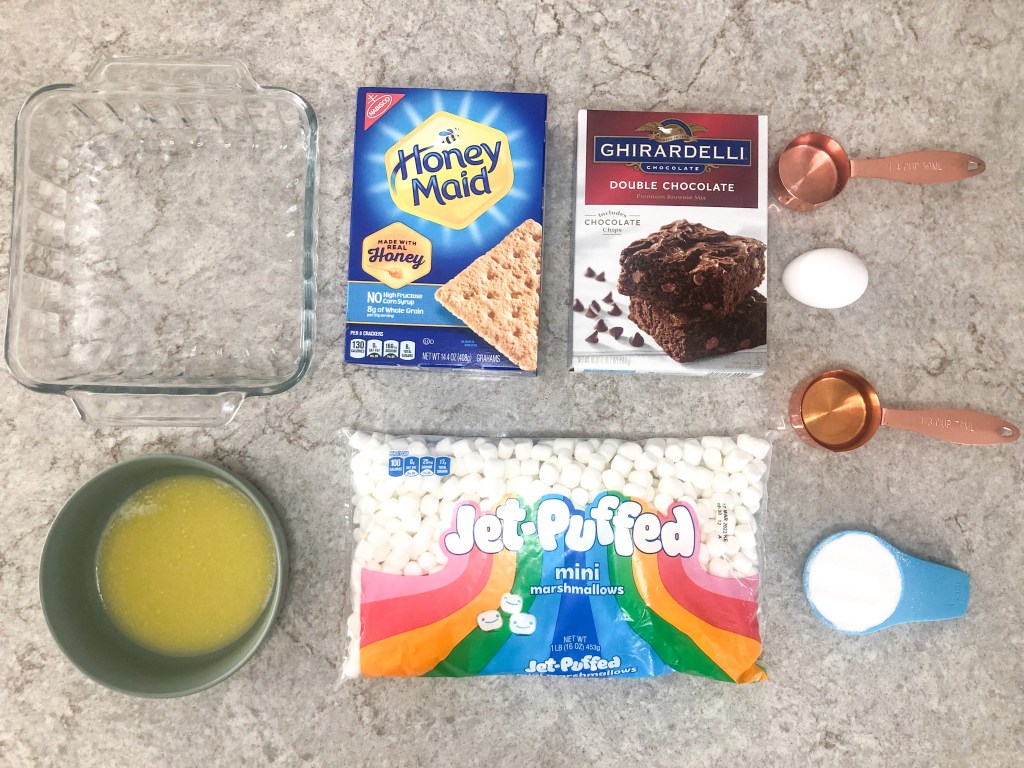
Ingredients

  1. Graham crackers
  2. Boxed brownie mix (we use Ghirardelli because it has delicious melty chocolate chips in it)
  3. 1/3 cup granulated sugar
  4. 1/3 cup melted butter
  5. 1/4 cup water
  6. 1/3 cup vegetable oil
  7. 1 egg
  8. Mini marshmallows

Directions

For the Graham Cracker Layer:

  1. Preheat oven to 400°
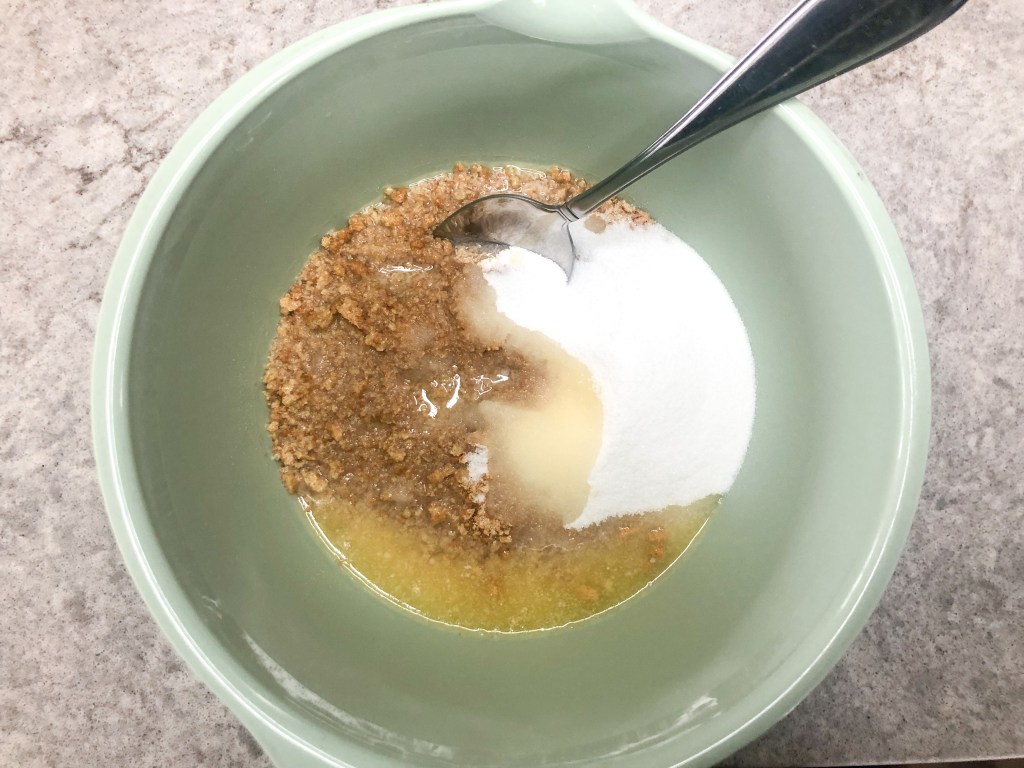
  2. Crush 12 sheets of graham crackers in a plastic bag until it has the constancy of sand.
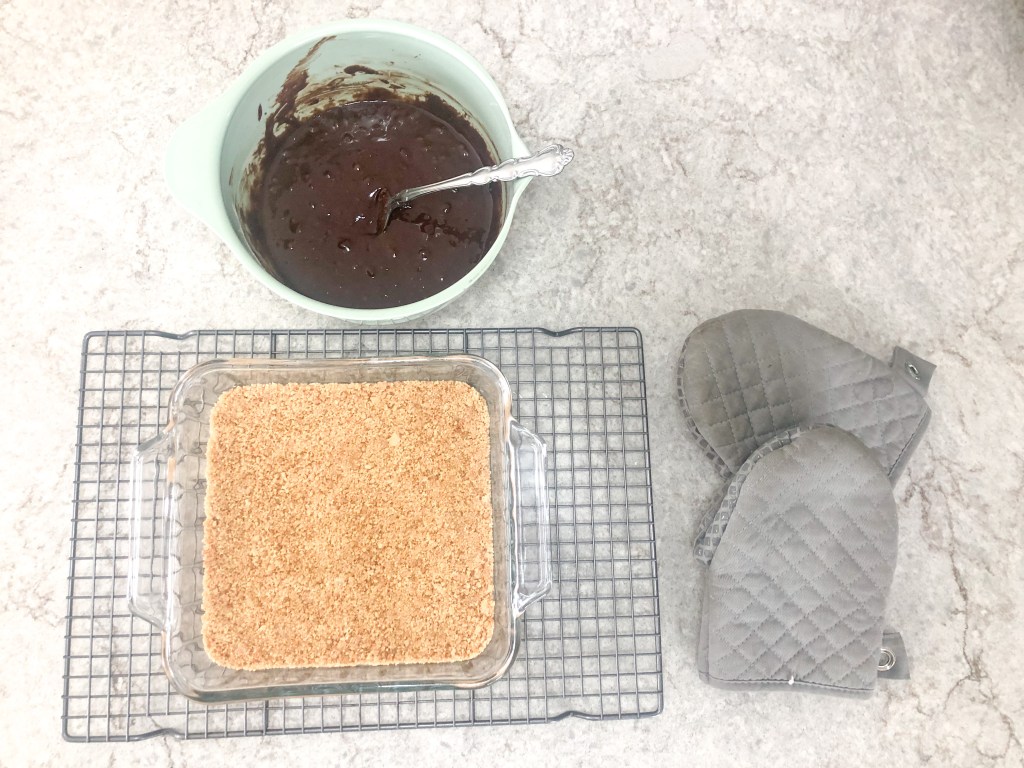
  3. Pour crushed graham crackers in a bowl along with melted butter and granulated sugar.
  4. Stir to combine.
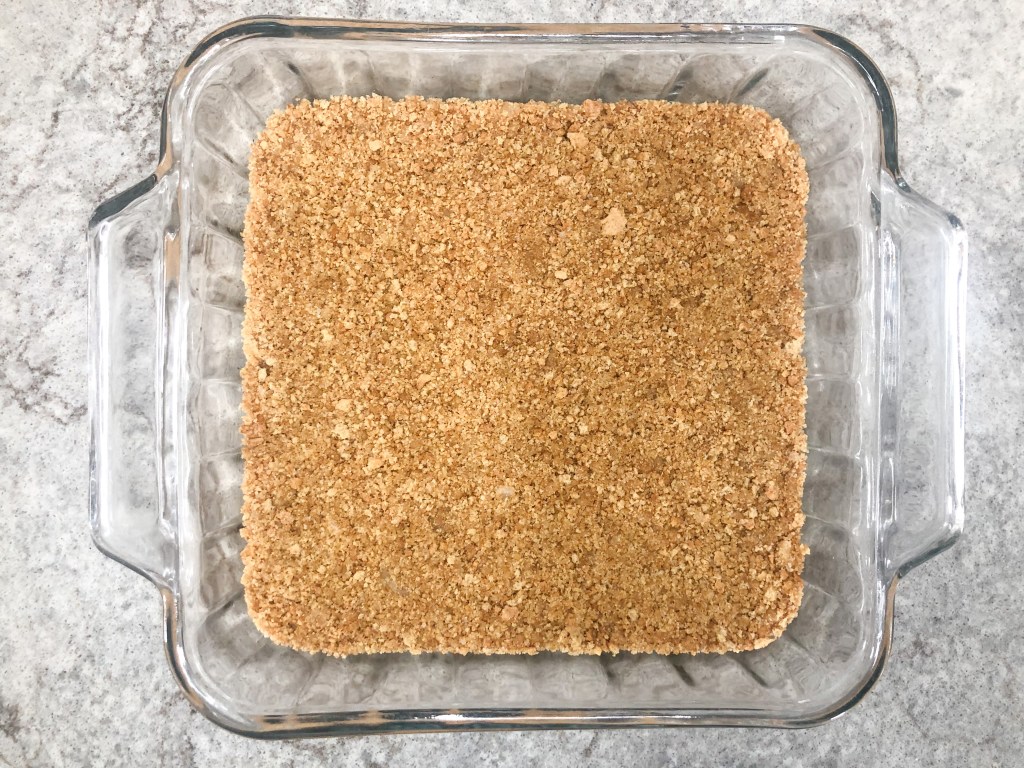
  5. Pour graham cracker mixture into the bottom of 9×9 baking dish. (I didn’t spray my glass baking dish and luckily didn’t have a problem getting the brownies out, but not a bad idea to spray it)
  6. Bake for 5-7 minutes for the layer to set. Take out and let cool.

Next Steps:

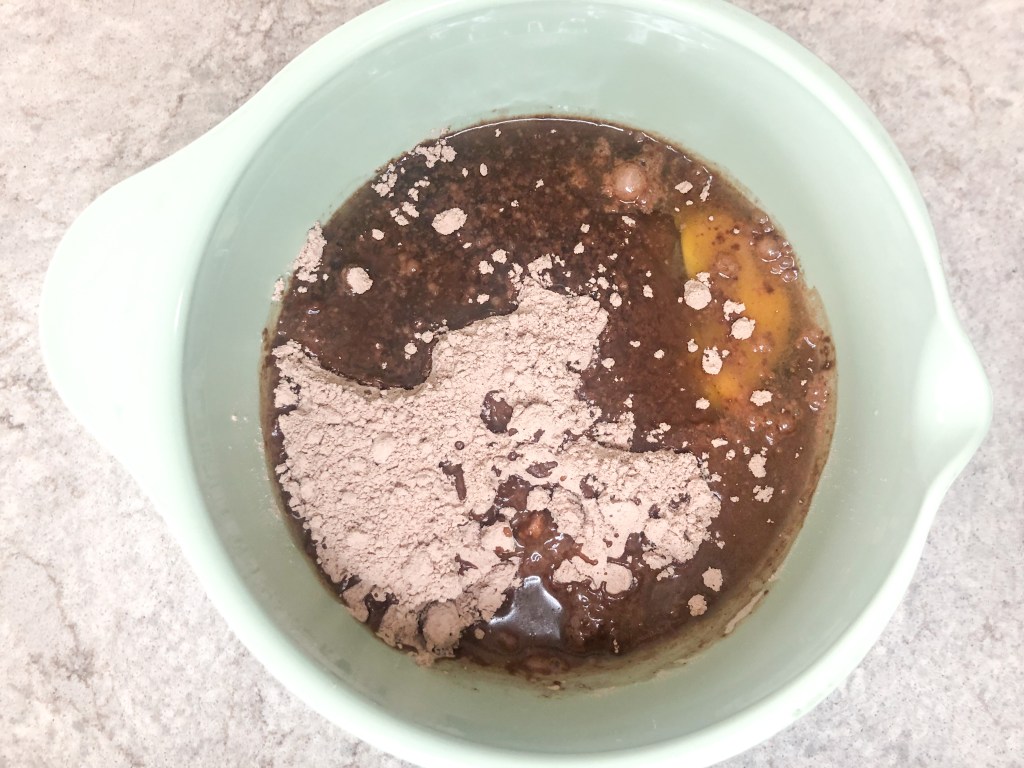
  1. Combined boxed brownie mix with oil, egg and water (follow box directions).
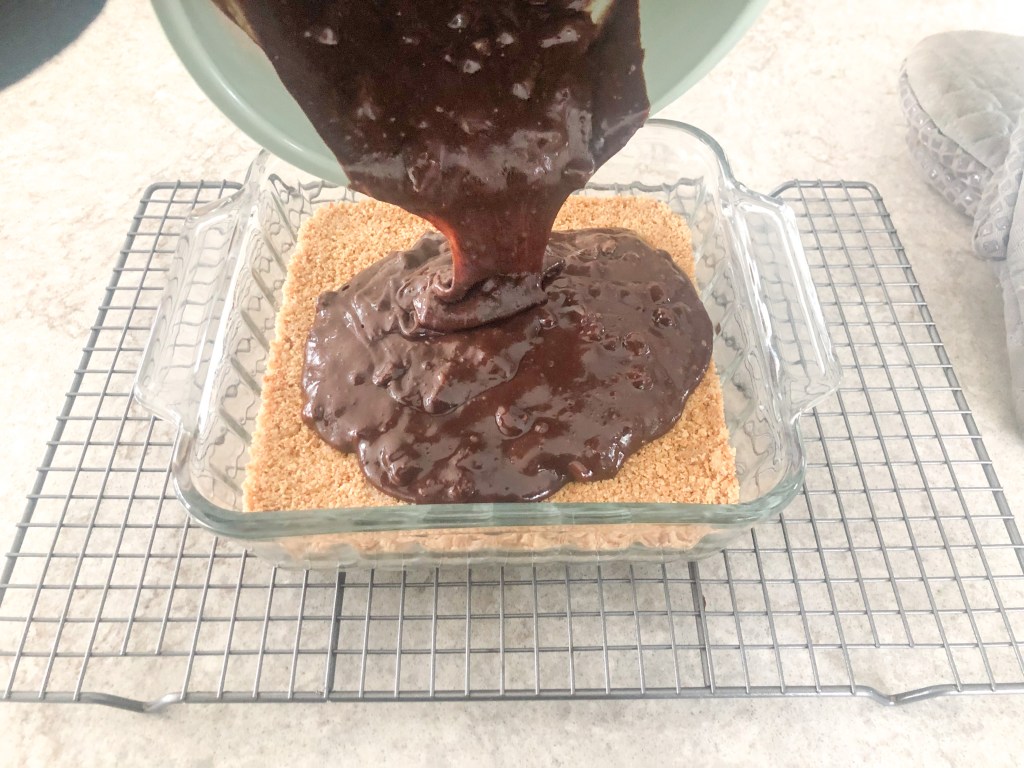
  2. Pour brownie batter on top of graham cracker layer. Spread evenly.
  3. Bake brownie/graham cracker layers according to box. I had to add about 10 more minutes.
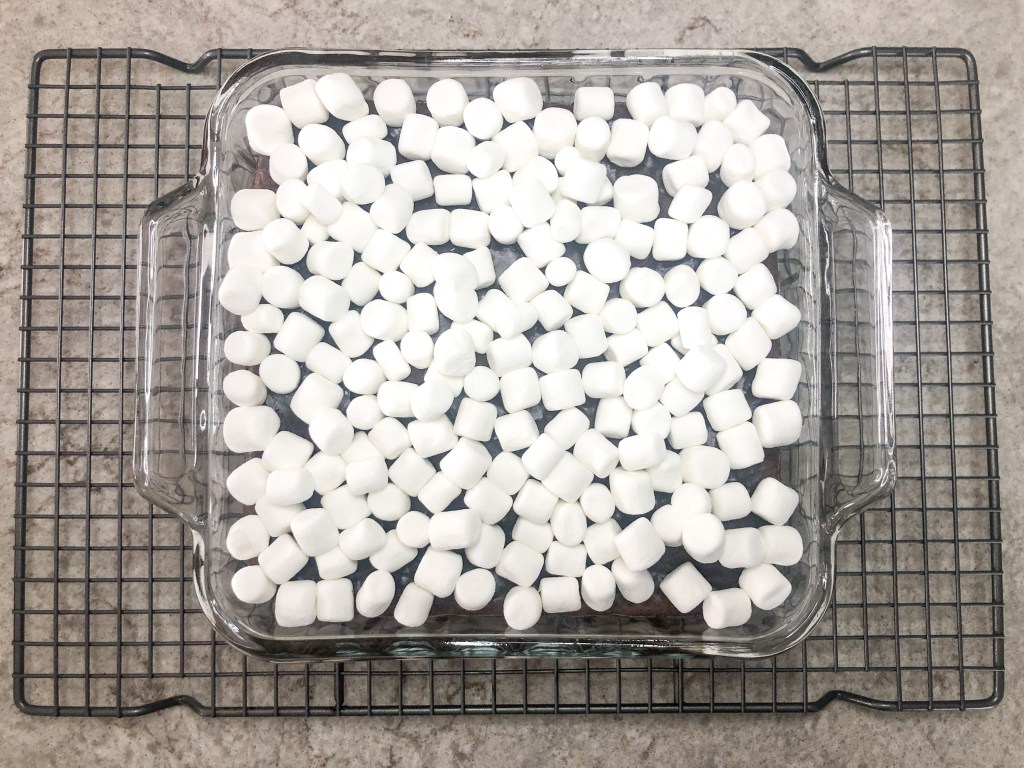
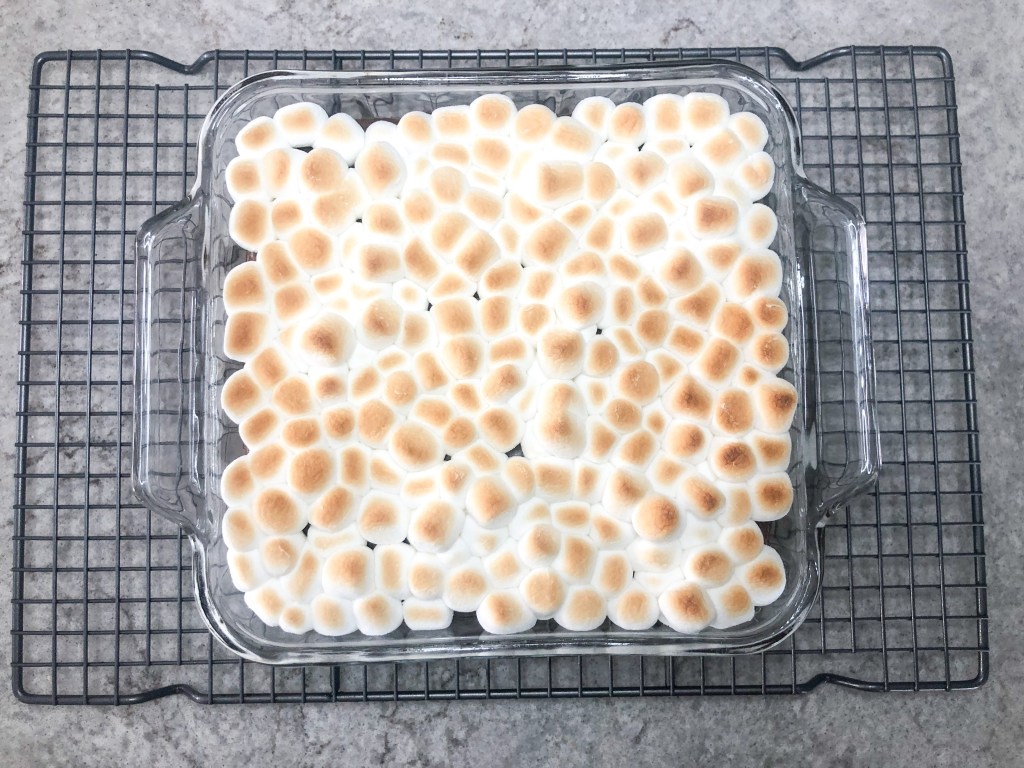
  4. Once toothpick comes out clean (or almost clean in my house), sprinkle with mini marshmallows. I didn’t measure this but I used just enough to barely cover the brownie, as they will expand in the heat.
  5. Turn oven to “Broil”.
  6. Place brownie bars into oven, not too close to broiler. DO NOT WALK AWAY. Marshmallows go from golden to on fire very quickly!!!
  7. Broil to your desired toastyness, I sat on the floor and watched them through the little oven window.
  8. Take brownies out of oven and let cool slightly before cutting.
  9. Enjoy!

Apple Pie Bites

We love creating something from complete scratch just as much as the next person…but we also LOVE short cuts. There is no better feeling than cutting the time it takes to create a recipe in half with just a simple switch! Rather than making a whole pie crust, rolling it out and cutting it with a round biscuit cutter, we swapped for store-bought sugar cookie dough! And to make it even faster..it’s already balled up in individual cookie portions!

Ingredients

  1. 4 Granny Smith apples
  2. A 24 pack sugar cookie dough
  3. 1/3 cup butter
  4. 1/2 teaspoon cinnamon
  5. 1/4 teaspoon ground nutmeg
  6. 1/4 teaspoon ground cloves
  7. 1 tablespoon maple syrup
  8. Splash of vanilla
  9. 1/4 teaspoon salt
  10. 1 tablespoon lemon juice
  11. 1 tablespoon corn starch

Directions

  1. Preheat oven to 350° and spray mini muffin pan with non-stick cooking spray.
  2. Fill each muffin pan hole with one ball of sugar cookie dough – no need to press it down or shape it!
  3. Bake according to package. Once done baking, remove the pan from the stove and *gently* slam pan to get any air out of the cookies, this will help the middle of the cookie cave in to create a little bowl. Let cookies cool almost completely in the pan.
  4. Meanwhile, peel and cut up apples into small bite-sized pieces.
  5. Over medium heat, melt butter on stove top, once butter is melted and a little bubbly, pour in chopped apples, stir to coat apples in butter.
  6. Let apples and butter cook over medium heat for about 7-10 minutes, stirring occasionally.
  7. Once apples start to soften, add in cinnamon, nutmeg, cloves, syrup, salt and lemon juice. Stir to coat apples.
  8. When the apples are coated, let cook for 5 minutes to continue to soften.
  9. Once apples are soft, reduce heat to medium/low and pour in corn starch slurry (1 tablespoon of cornstarch to 2 tablespoons water).
  10. Cook until sauce thickens (about 2-3 minutes) over medium/low heat.
  11. Remove cooled cookies from muffin pan and place on cooling racks.
  12. Spoon about a tablespoon of apple pie filling into each cookie.
  13. OPTIONAL: Drizzle with caramel – I used a jar of store-bought caramel, warmed it up and added a sprinkle of sea salt!
  14. Plate up and enjoy!

Meatball Soup

The weather is FINALLY cooling off for fake Fall in SoCal so we are taking advantage of it! Once we saw the cloud cover we ran to the store to make one of our favorite soups, meatball soup!

Ingredients

For the Meatballs:

  1. 1 lb ground beef (7%)
  2. Packet of meat loaf seasoning
  3. 1/4 cup Italian bread crumbs
  4. 1/4 cup instant rice
  5. 1 egg
  6. Salt & Pepper

For the Soup:

  1. 128 oz. beef broth
  2. 15 oz. tomato sauce
  3. 4 carrots (chopped)
  4. 4 celery stalks (chopped)
  5. 1 lb extra-wide egg noodles
  6. Optional: Beef Bouillon (1 cube per 1 cup water if needing more broth)

Directions:

  1. Pour beef broth into pot along with tomato sauce and chopped carrots and celery. Bring to boil.
  2. Meanwhile, combine ground beef, a sprinkle of meat loaf seasoning, Italian bread crumbs, instant rice, egg and salt and pepper in a bowl. Hands work best!
  3. Once meat is combined, scoop and roll into meatballs. (Mine made 24)
  4. Add meatballs to broth and continue to boil.
  5. Once meatballs are just about cooked through (About 20 minutes) add package of egg noodles.
  6. Boil for about 7-8 more minutes.
  7. Serve and enjoy!

Peanut Butter Chip Banana Bread

Who doesn’t love a banana smothered in peanut butter? Followed by 1 (or 3) spoonfuls of more peanut butter? We know we do! So we decided to mash it up into a warm, gooey baked dessert! Well let’s cut to the chase, because no one wants to read 10 paragraphs on how this bread changed our lives..

Ingredients

  • 2 cups mashed banana (took me 5 overripe bananas)
  • 2 cups flour
  • 1/4 teaspoon salt
  • 1 teaspoon baking powder
  • 2 large eggs
  • 1 stick of butter (1/2 cup)
  • 3/4 cup packed brown sugar
  • 1 cup peanut butter chips

Directions

  1. Spray loaf pan with non-stick cooking spray and pre-heat your oven to 350°.
  2. Combine flour, salt and baking soda in a bowl.
  3. In a stand mixer, cream together butter and brown sugar, about 2 minutes.
  4. Beat both eggs and add to stand mixer along with mashed bananas, mix well.
  5. Add dry mixture to stand mixer. I prefer to do a little at a time to prevent flour catastrophe. Mix till just combined.
  6. Add peanut butter chips into stand mixture and mix till combined.
  7. Pour mixture into sprayed loaf pan and bake for 65 minutes or until toothpick comes out clean!

It’s Nice to Meet You!

First things first, let’s go ahead and introduce ourselves. We are the three Harchut sisters, Caitlin, the oldest, Lauren, the middle, and Sierra, the youngest – and the best cook!

Growing up, we weren’t a “Sunday night dinner” family, we were an “every night dinner” family. Whether someone was running out to dance class, getting home from soccer practice, or even being dragged to basketball practice *cough* Sierra *cough*, our mom ALWAYS had dinner on the table. Whether it was a delicious box of Hamburger Helper or an elaborate slow cooked roast, there was always a hot meal after a long day.

We think that is part of the reason as to why we love food so much. Sure, you need food to live, but our family has shared some of the best stories around the dinner table. It’s a time for us to catch up on each others lives, to argue for showing up at the table in our sister’s shirt – and then dropping food on it, and to plan our next meal!

Introduce Yourself (Example Post)

This is an example post, originally published as part of Blogging University. Enroll in one of our ten programs, and start your blog right.

You’re going to publish a post today. Don’t worry about how your blog looks. Don’t worry if you haven’t given it a name yet, or you’re feeling overwhelmed. Just click the “New Post” button, and tell us why you’re here.

Why do this?

  • Because it gives new readers context. What are you about? Why should they read your blog?
  • Because it will help you focus your own ideas about your blog and what you’d like to do with it.

The post can be short or long, a personal intro to your life or a bloggy mission statement, a manifesto for the future or a simple outline of your the types of things you hope to publish.

To help you get started, here are a few questions:

  • Why are you blogging publicly, rather than keeping a personal journal?
  • What topics do you think you’ll write about?
  • Who would you love to connect with via your blog?
  • If you blog successfully throughout the next year, what would you hope to have accomplished?

You’re not locked into any of this; one of the wonderful things about blogs is how they constantly evolve as we learn, grow, and interact with one another — but it’s good to know where and why you started, and articulating your goals may just give you a few other post ideas.

Can’t think how to get started? Just write the first thing that pops into your head. Anne Lamott, author of a book on writing we love, says that you need to give yourself permission to write a “crappy first draft”. Anne makes a great point — just start writing, and worry about editing it later.

When you’re ready to publish, give your post three to five tags that describe your blog’s focus — writing, photography, fiction, parenting, food, cars, movies, sports, whatever. These tags will help others who care about your topics find you in the Reader. Make sure one of the tags is “zerotohero,” so other new bloggers can find you, too.